
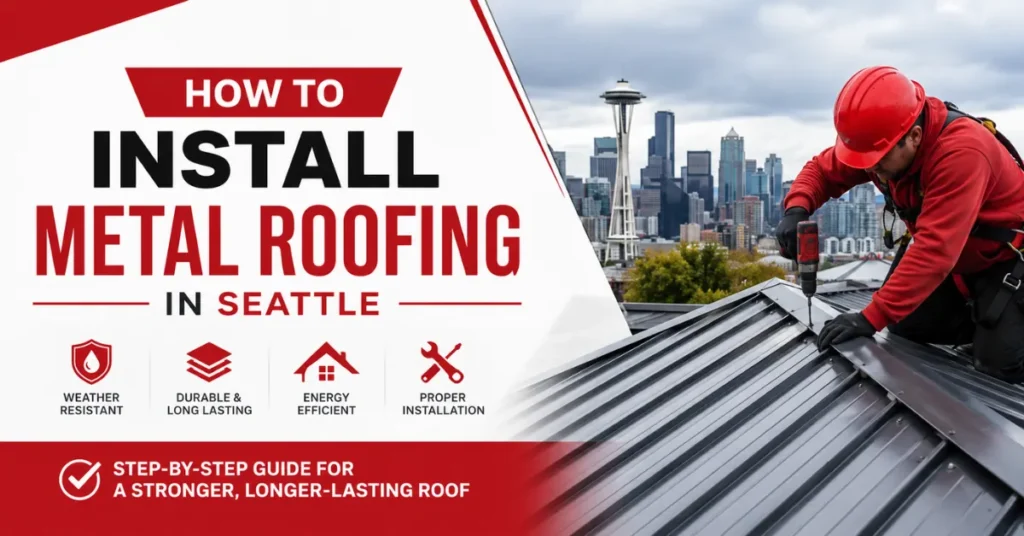
Metal roofing has become one of the most popular upgrades for homeowners across the Pacific Northwest, and it’s easy to see why. Seattle’s climate is tough on roofs — near-constant drizzle, heavy winter storms, occasional snow, and long stretches of damp, moss-friendly weather all take a toll on traditional materials. Metal roofing stands up to these conditions in a way that asphalt shingles often can’t, offering decades of reliable protection with minimal upkeep.
But metal roofing only delivers on that promise when it’s installed correctly. A poorly installed metal roof can leak, corrode prematurely, or fail to meet Seattle’s building codes — turning a long-term investment into a costly headache. This guide walks through everything you need to know about how to install metal roofing in Seattle, from choosing the right materials to the exact steps of metal roof installation in Seattle, so you can make informed decisions whether you are hiring a contractor or evaluating a DIY approach.
We’ll also cover what actually qualifies as the best metal roofing for Seattle weather, the codes and permits you need to know about, common mistakes to avoid, and how much you should expect to budget for the project.
Why Metal Roofing Is Ideal for Seattle’s Climate
Seattle sees rain most months of the year, along with high humidity and, occasionally, wet snow. That combination is exactly where metal roofing shines.
- Waterproof performance: When installed with proper seams, flashing, and underlayment, metal roofing sheds water far more effectively than shingles, which can absorb moisture and degrade over time.
- Corrosion resistance: Modern steel and aluminum roofing panels are coated with protective finishes (like Galvalume or PVDF coatings) specifically designed to resist rust and corrosion in wet, coastal-adjacent climates.
- Wind resistance: Metal panels are mechanically fastened or interlocked, giving them much higher wind-uptake ratings than shingles, which matters during the Pacific Northwest’s windstorm season.
- Energy efficiency: Reflective metal roofing coatings help reduce heat absorption, which can lower cooling costs during Seattle’s warmer summer months while still performing well in cold, wet winters.
Given these advantages, it’s no surprise that weather-resistant roofing made from steel roofing panels or aluminum roofing is increasingly the go-to choice for homeowners investing in durable roofing materials built for Pacific Northwest roofing conditions.
Understanding Seattle Building Codes Before Installation
Before any panel goes on the roof, it’s essential to understand the local regulatory requirements. Skipping this step is one of the most common and costly mistakes homeowners make.
Permits and Local Roofing Requirements
Most roof replacement or new installation projects in Seattle require a building permit, particularly when the project involves structural work, a full tear-off, or changes to the roofline. Seattle’s building code for metal roofing also addresses fire ratings, underlayment requirements, and attachment methods, so it’s worth confirming requirements with the city or your licensed roofing contractor before work begins. A roof inspection may also be required at various stages of the project to confirm compliance.
Roof Pitch Requirements
Roof pitch affects which metal roofing systems can be used and how they need to be installed. Panels intended for steeper slopes may not perform the same way on low-slope applications, and manufacturers typically specify minimum pitch requirements for warranty coverage. Confirming your roof pitch early helps determine both material choice and installation method.
Choosing Code-Compliant Roofing Materials
Not every metal roofing product on the market meets Seattle’s code requirements. Materials need to meet local fire, wind, and moisture-resistance standards, and installation must follow manufacturer specifications to remain compliant and warrantied.
Choosing the Best Metal Roofing Material
Selecting the right material is just as important as the installation itself. Here’s how the most common options compare.
Standing Seam Metal Roofing
Standing seam panels feature raised, interlocking seams that run vertically up the roof, hiding fasteners beneath the panel surface. This design makes standing seam metal roofing one of the most watertight options available — a major advantage in a rainy climate like Seattle’s.
Corrugated Metal Panels
Corrugated panels are a more budget-friendly option, typically exposed-fastener systems with a wavy or ribbed profile. They’re durable and relatively easy to install, though the exposed fasteners require more diligent maintenance over time to prevent leaks.
Steel vs Aluminum vs Copper Roofing
| Material | Lifespan | Maintenance | Cost | Appearance |
|---|---|---|---|---|
| Galvanized/Galvalume Steel | 40–70 years | Low | $$ | Clean, industrial |
| Aluminum | 40–60 years | Very low (won’t rust) | –$ | Lightweight, modern |
| Copper | 60–100+ years | Minimal (develops patina) | $$$$ | Premium, distinctive |
Steel is the most common choice for its balance of cost and durability. Aluminum resists corrosion exceptionally well, making it a strong option for coastal-adjacent areas. Copper offers unmatched longevity and a distinctive look but comes at a premium price point.
Essential Tools and Materials for Metal Roof Installation
Before starting a project, gather the right equipment. A proper checklist keeps the job efficient and safe.
Tools
- Tape measure
- Chalk line
- Drill
- Metal snips
- Roofing screw gun
- Ladder
- Safety harness
Materials
- Roofing underlayment
- Ice and water shield
- Roof flashing
- Drip edge
- Ridge cap
- Roofing screws
- Closure strips
- Sealant
Having quality roofing installation tools on hand, along with the right roofing underlayment, roof flashing, drip edge, and ridge cap materials, sets the foundation for a waterproof roofing system that performs well for decades.
Preparing the Roof Before Installation
Remove Old Roofing (If Necessary): If you’re replacing an existing roof, the old shingles or panels typically need to be removed down to the decking. This allows for a full inspection and ensures the new system is installed on a solid, even surface.
Inspect Roof Decking: A thorough roof sheathing inspection identifies any rot, soft spots, or structural damage that needs to be addressed before installation. Installing metal panels over compromised roof decking can lead to sagging or premature failure.
Install Moisture Protection: Given Seattle’s rainfall, moisture protection is non-negotiable. This typically includes a synthetic underlayment across the full roof deck, along with an ice and water shield in vulnerable areas like eaves, valleys, and around penetrations. This layer of moisture protection acts as a critical backup barrier beneath the metal panels.
Step-by-Step Guide: How to Install Metal Roofing in Seattle
Step 1 – Measure the Roof
Start by calculating the total square footage of the roof, accounting for slopes, valleys, and overhangs. This determines how many panels you’ll need and informs the panel layout — the arrangement of panels across each roof plane to minimize seams and waste.
Step 2 – Install Drip Edge
Drip edge is installed along the eaves and rakes before the underlayment goes down. In Seattle’s climate, this small detail plays an outsized role in rain protection, directing water away from the fascia and preventing it from wicking back under the roofing system.
Step 3 – Install Roofing Underlayment
Roll out the synthetic underlayment across the roof deck, working from the bottom up. Proper overlap between rows (typically several inches, per manufacturer specs) and secure fastening prevent water infiltration at the seams.
Step 4 – Install Flashing Around Roof Features
Flashing needs to be carefully installed around all roof penetrations, including chimneys, skylights, and vents. This step is one of the most critical for preventing leaks — improperly flashed penetrations are a leading cause of roof flashing failures. Each flashing point should create a continuous waterproof seal with the surrounding underlayment and panels.
Step 5 – Position Metal Roofing Panels
Panels are positioned according to the layout plan, with careful attention to alignment across the roof plane. Depending on the system, panels will need proper overlap at the seams and expansion gaps to accommodate temperature-driven expansion and contraction — an important consideration given Seattle’s seasonal temperature swings.
Step 6 – Secure Panels with Roofing Screws
Panels are fastened using roofing screws at manufacturer-specified intervals. Correct fastener spacing and screw placement are essential — too few fasteners can allow panels to shift or lift in high winds, while incorrect placement can create unnecessary penetration points that risk leaks.
Step 7 – Install Ridge Cap
The ridge cap covers the peak where roof planes meet, providing both a finished look and a critical waterproof transition. This step often ties into roof ventilation, since ridge vents integrated into the ridge cap help regulate attic ventilation and prevent moisture buildup inside the roof assembly.
Step 8 – Final Inspection
Before calling the job complete, do a full walk-through checking for loose fasteners, properly sealed flashing, adequate sealant application, and clear drainage paths. This final roof inspection in Seattle is your last opportunity to catch small issues before they become costly leaks.
Common Metal Roofing Installation Mistakes to Avoid
Even experienced installers can make costly errors on a metal roof project. Watch out for:
- Incorrect screw placement — over-driving or under-driving fasteners compromises the seal
- Poor panel alignment — leads to uneven seams and water pooling
- Skipping underlayment — removes a critical moisture backup layer
- Inadequate flashing — the most common source of roof leaks
- Ignoring ventilation — can trap moisture and cause condensation damage inside the attic
- Improper overlap — reduces the roof’s ability to shed water effectively
Avoiding these roofing mistakes is essential for both leak prevention and maintaining waterproof roofing performance over the life of the roof.
DIY vs Hiring a Seattle Metal Roofing Contractor
DIY Installation Pros
- Lower upfront labor cost
- Full control over project timeline
- Hands-on learning experience for capable homeowners
DIY Risks
- Steep learning curve for proper flashing and sealing techniques
- Safety risks working at height, especially on wet or sloped roofs
- Voided manufacturer warranties if installation doesn’t meet specifications
- Permit and code compliance issues if not handled correctly
Professional Installation Benefits
- Manufacturer and workmanship warranties
- Trained crews familiar with safety protocols for roof work
- Experience navigating permits and inspections
- Consistent, code-compliant workmanship
For most homeowners, hiring a Seattle roofing contractor offers peace of mind that’s hard to replicate with a DIY approach — particularly given how much of a metal roof’s performance depends on precise flashing and fastening work. A professional metal roof installation performed by a licensed roofing contractor also typically comes bundled with residential roofing services like warranty support and follow-up inspections.
How Much Does Metal Roof Installation Cost in Seattle?
Metal roof installation costs vary based on several factors:
- Roof size — larger roofs require more material and labor
- Material — steel, aluminum, and copper carry different price points
- Roof complexity — steep pitches, multiple valleys, and dormers add labor time
- Labor — rates vary by contractor and project scope
- Removal of old roof — tear-off adds to overall cost
- Flashing — more penetrations (chimneys, skylights, vents) increase flashing work
- Accessories — ridge vents, snow guards, and trim add to the total
Because of these variables, metal roof installation cost can range widely from one project to the next. Getting a detailed quote from a local contractor factoring in your specific roof size, material choice, and complexity — is the most reliable way to budget for a Seattle roof replacement.
Metal Roof Maintenance Tips for Seattle Homes
Metal roofs are low-maintenance, but a few routine tasks go a long way toward maximizing their lifespan in a wet climate:
- Cleaning debris — leaves and needles trap moisture against the roof surface
- Moss prevention — Seattle’s damp climate is prone to moss growth; periodic treatment helps prevent buildup
- Gutter maintenance — clogged gutters can cause water to back up under roofing edges
- Annual inspections — catch small issues before they become major repairs in Seattle
- Sealant checks — sealant around flashing and fasteners can degrade over time and needs periodic reapplication
- Fastener tightening — exposed-fastener systems in particular benefit from periodic checks
Staying on top of metal roof maintenance, including regular roof inspection and attention to gutter compatibility and roof drainage, helps protect your investment for decades.
Frequently Asked Questions
Is metal roofing good for Seattle’s rainy climate?
Yes. Metal roofing sheds water effectively and resists the moisture-related deterioration that affects other roofing materials over time.
How long do metal roofs last in Seattle?
Depending on the material, metal roofs can last anywhere from 40 to over 100 years with proper installation and maintenance.
Is standing seam better than corrugated metal?
Standing seam offers superior waterproofing due to its concealed fastener design, while corrugated panels are more budget-friendly. The best choice depends on your budget and performance priorities.
How often should a metal roof be inspected?
An annual inspection is generally recommended, along with a check after major storms.
Conclusion
A metal roof is one of the best long-term investments a Seattle homeowner can make, but only when it’s built on proper planning, the right materials, and installation best practices that meet Seattle’s building codes. From the first measurement to the final inspection, every step in the process of metal roof installation in Seattle plays a role in how well the roof performs against the region’s rain, wind, and moisture over the years to come.
Whether you choose standing seam metal roofing for its clean, watertight design or a more budget-conscious corrugated option, success comes down to details: quality roofing underlayment, properly installed roof flashing, correct fastener spacing, and ongoing maintenance. And for most homeowners, partnering with an experienced Seattle roofing contractor is the surest way to get a weather-resistant roofing system that lasts.
If you’re ready to move forward, understanding how to install metal roofing in Seattle the right way or knowing what to ask a contractor before you hire one puts you in the best position for a roof that performs beautifully for decades.